
Token Vesting Step-by-Step - Full Guide From Start to Finish
From collecting info, to creating the vesting schedule, and handling withdrawals, let's find out how to prepare for vesting contracts...

You want to create a token vesting schedule, but you don't know where to start?
This easy 9 step process, guides you through getting all the way through the process, from collecting the info needed for a vesting contract, to communicating with your employees and stakeholders on withdrawing tokens.
What do you need for a token vesting schedule? Let's find out...
1. Define Your Vesting Requirements
As project leader you should start by clearly defining the goals and requirements for token vesting:
- Identifying Recipients: Determine who will receive the vested tokens (e.g., team members, advisors, investors, your mum).
- Purpose: Decide if the tokens are for team incentives, investor protections, or to ensure long-term project sustainability. Consider the length of your project and what your community would expect.
- Amount: Calculate the total number of tokens to be allocated for vesting. This goes hand in hand with tokenomics and long term organisation strategy.
- Vesting Period: Define how long the vesting schedule will last (e.g., 1 year, 2 years, 4 years).
- Cliff Period: Specify if there’s an initial lock-up period (cliff) during which no tokens are released.
- Release Frequency: Decide how often tokens will be released after the cliff (e.g., monthly, quarterly).
- Conditions: Establish any conditions that must be met for token vesting (e.g., employment status, milestones, project completion, roadmap, etc.).
2. Choose a Crypto Vesting Service Provider
Next, do your research and find a vesting service to automate and securely manage the token vesting process.
- Research Providers: Look for apps that offer smart contract vesting services through a wizard or tool.
- Features: Consider features like supported blockchains, flexibility, options, and reporting dashboards.
- Security: Audits from companies like Certik, Bailsec and Hacken are important to look for.
- Tutorials: Does the provider offer quick YouTube tutorials, step-by-step wizards, or FAQs?
- Support: 24/7 support, through multiple channels - to help with any emergency questions and onboarding.
- Testnets: Can you try the token vesting wizard with a completely free trial on a network like Sepolia?
- Dashboard: Does the token vesting service have a dashboard so you and your recipients can monitor and withdraw without having to use spreadsheets to keep track of dates and schedules?
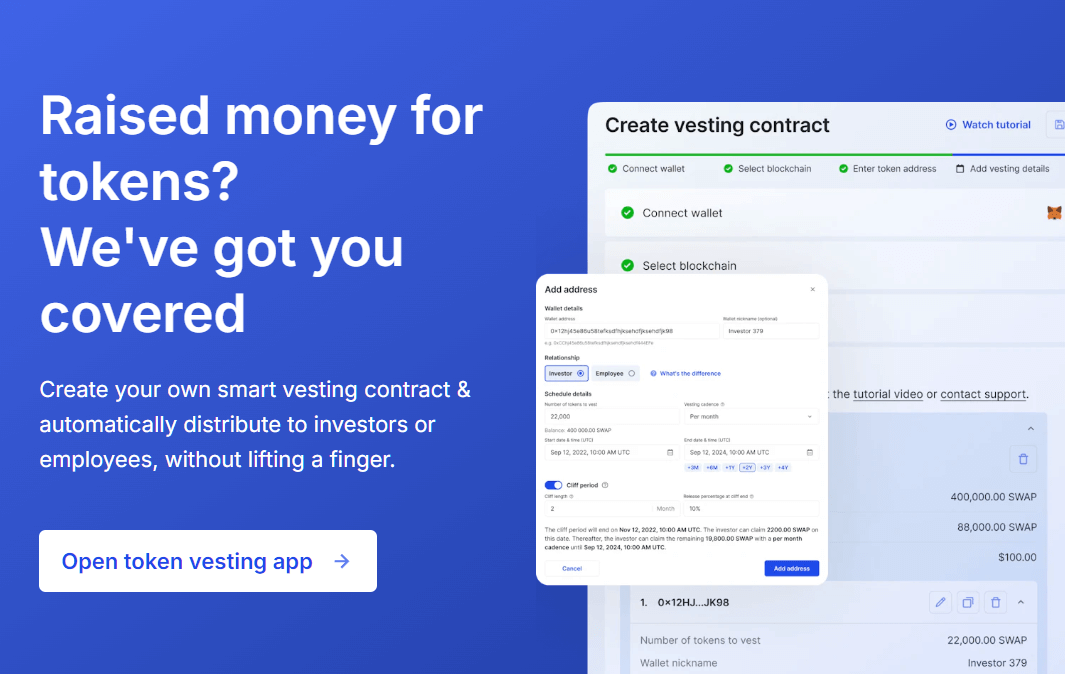
3. Create a Token Vesting Contract
We published a complete vesting tutorial to get you started
Now it's time to sit down and do the work, creating the actual vesting schedules:
- Create the Details: Using the platform you chose, create a smart contract that defines the vesting rules. This includes:
- Token Allocation: Set the number of tokens to be vested.
- Beneficiaries: Add wallet addresses of the recipients.
- Vesting Schedule: Define the start date, cliff, and release frequency within the contract.
- Review the Contract: This is your time to really make sure all the details are correct, double check everything you have set up and make sure it matches your plans.
4. Deploy or Confirm the Smart Contract
Send your contract live by clicking "Confirm" in the app, and your wallet:
- Deploy to Blockchain: The vesting contract is deployed onto the blockchain, and it becomes immutable, meaning that the terms cannot be changed after deployment. This is why it's so important to double check details in the last step.
- Transaction Costs: Pay the necessary gas fees for the deployment of the smart contract. These can usually be shown directly in your wallet.
5. Communicate with Stakeholders
Once the vesting contract is live, and can be seen on an explorer with tx records, it's time to let your team know:
- Provide Transparency: Share the details of the vesting schedule with all beneficiaries to ensure clarity and transparency. You may be able to share a dashboard for your investors or employees, so they can also see the contract details by logging in with their wallets.
- Milestones and Updates: Notify the stakeholders about any milestones or conditions that could affect the vesting, such as project delays or team changes.
6. Monitor the Vesting Process
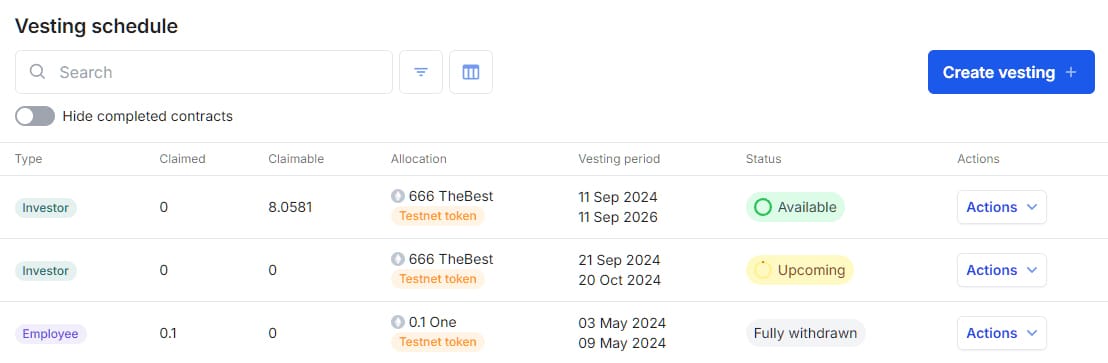
Regularly check back on the vesting process, check in on the provider, and make sure you can still see all the relevant details for the vesting schedule:
- Tracking Release: Monitor the periodic release of tokens as per the vesting contract. Most platforms offer dashboards to track the status.
- Handling Queries: Address any questions or issues from stakeholders, especially regarding the release of tokens. As mentioned above, if the provider offers the ability to log in via a wallet, the recipients should be able to view the details.
7. Adjust or Cancel (if needed)
If your project has any changes, you may need to go back into vesting app and adjust some details:
- Contractual Flexibility: In some cases, you may need to pause or modify vesting (e.g., if a team member leaves). This depends on whether the vesting contract allows such changes.
- Revoking Tokens: If recipients do not meet the required conditions (e.g., leaving the project early), you can revoke the unvested tokens, if allowed by the contract.
8. Unvest - Withdraw all the Tokens
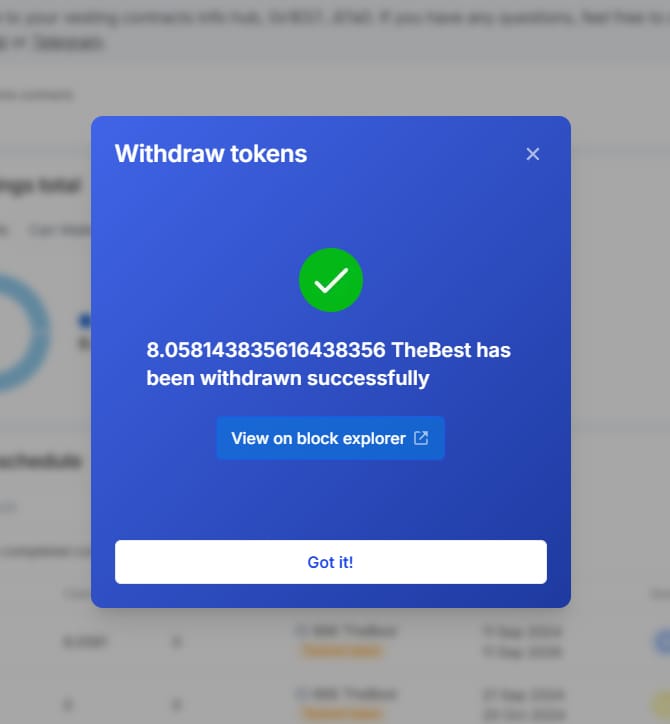
The big day has arrived, you can now withdraw tokens from the contract:
- Token Release: Check in with your recipients and the vesting service provider to ensure all the tokens have been released from the contract. You should be able to view these from your dashboard.
9. Project Review
Now that the whole process is complete, everyone has their tokens, and the dashboard is clear of any future schedules:
- Post Project Documentation: Review the full vesting process, milestones achieved, and any lessons learned for future vesting rounds or similar projects. This is important for shareholders, community, future operations, and any more vesting schedules you may want to create.
- Stakeholder Feedback: Gather feedback from the team and investors to assess whether the vesting model achieved its intended goals.