
How to Use a Multisender - An Easy Tutorial
How to send tokens to multiple addresses in a single transaction. Our quick guide on the best bulk token sender available...

Want to know how to create a token airdrop?
Looking for a tutorial on how to easily send tokens to multiple recipients?
In this super quick guide, I'll walk you through using your favorite wallet and blockchain to send tokens to multiple recipients in seconds. All for free using our Sepolia testnet as a trial option.
Our app allows you to pay salaries, distribute tokens, create batch payments, and set up rewards for marketing campaigns. Let's get started...
Step 1 - Connect your Wallet
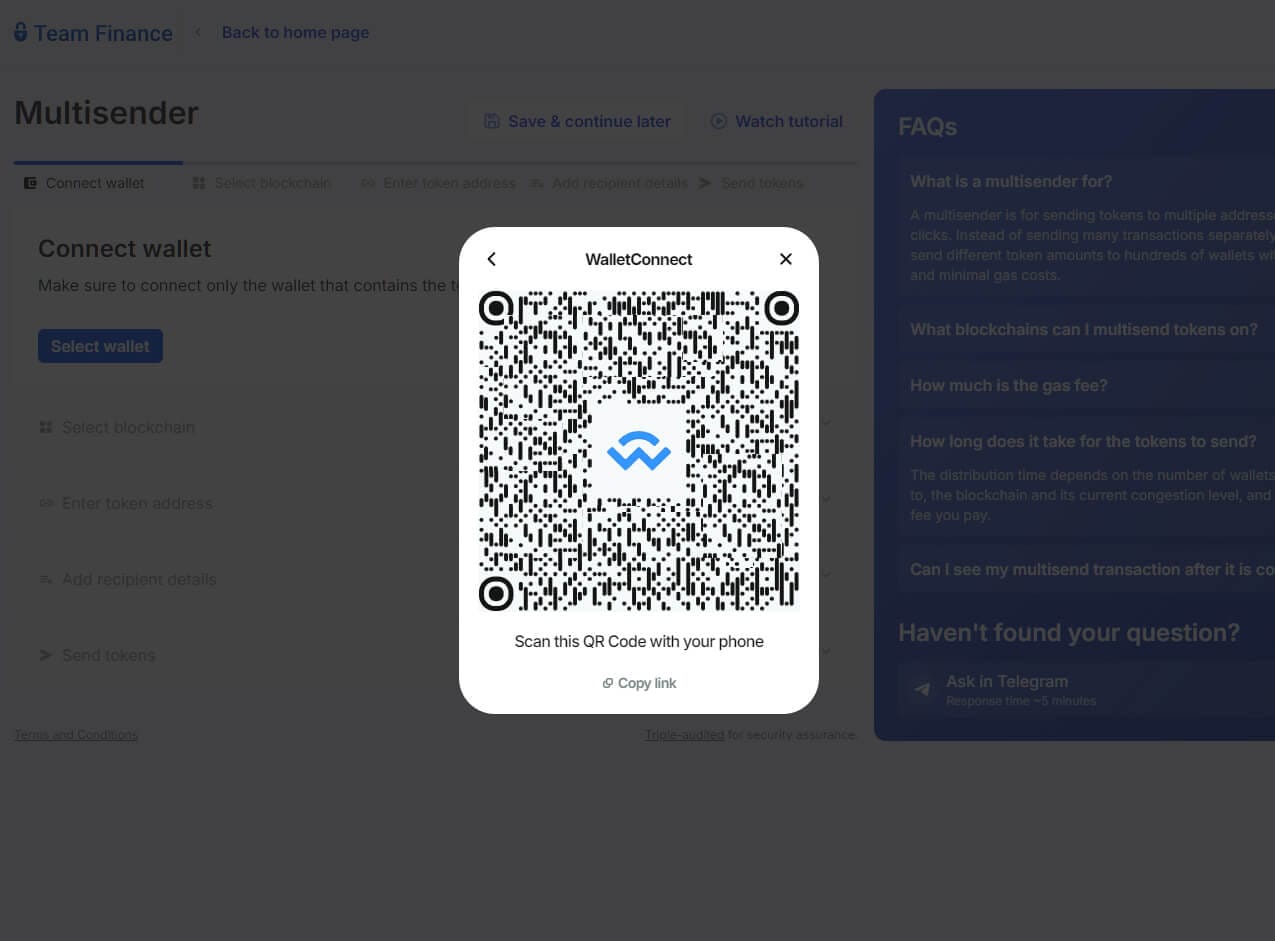
We have several wallets to choose from: OKX, WalletConnect, MetaMask, Rabby, and more. You can connect via QR Codes, or select from browser extensions, mobile and desktop options.
For this tutorial, I started with MetaMask.
Step 2 - Choose a Blockchain
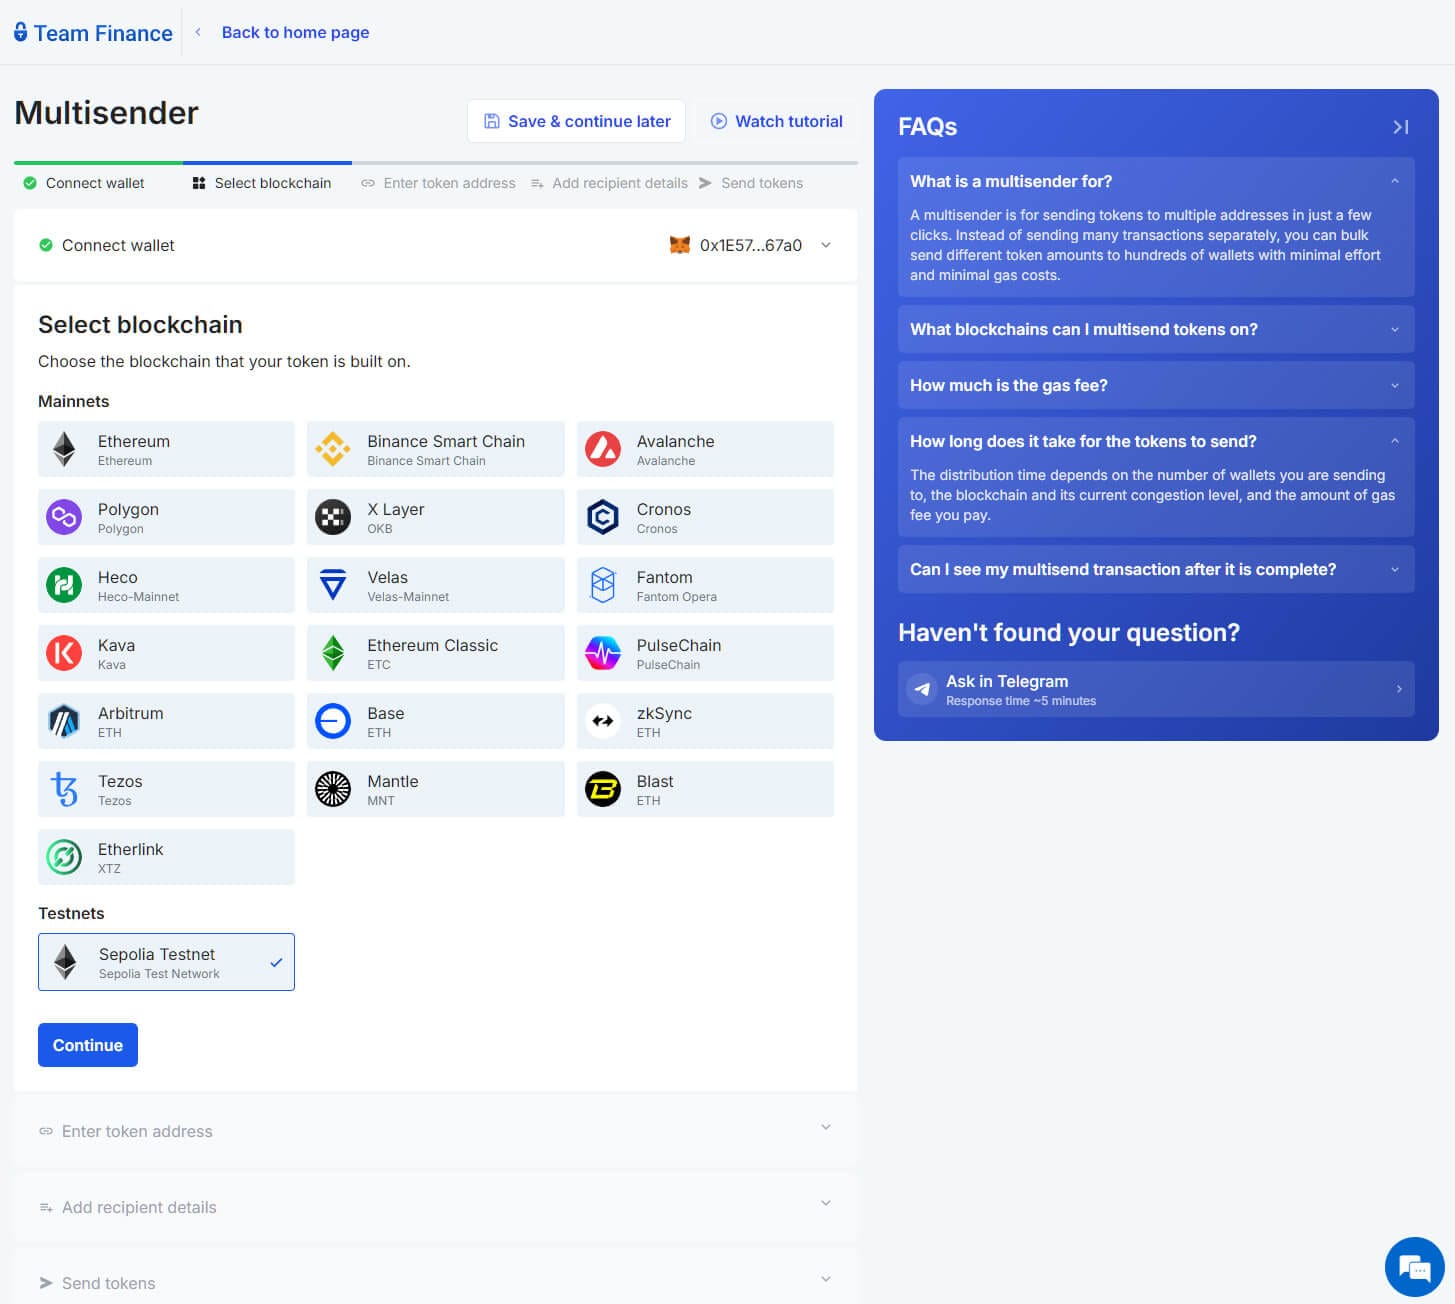
We have 20 blockchains to choose from right now, including BSC, Polygon, Etherlink and of course Sepolia.
Since this is a guide, I'm choosing Sepolia so that I can send tokens for free.
Step 3 - Enter your Token Addresses

If you followed the instructions so far, you will be able to select your token from the list that automatically populates.
I have several testnet tokens to choose from, but I could also add one manually with the input field.
Step 4 - Add Addresses to Send Tokens to
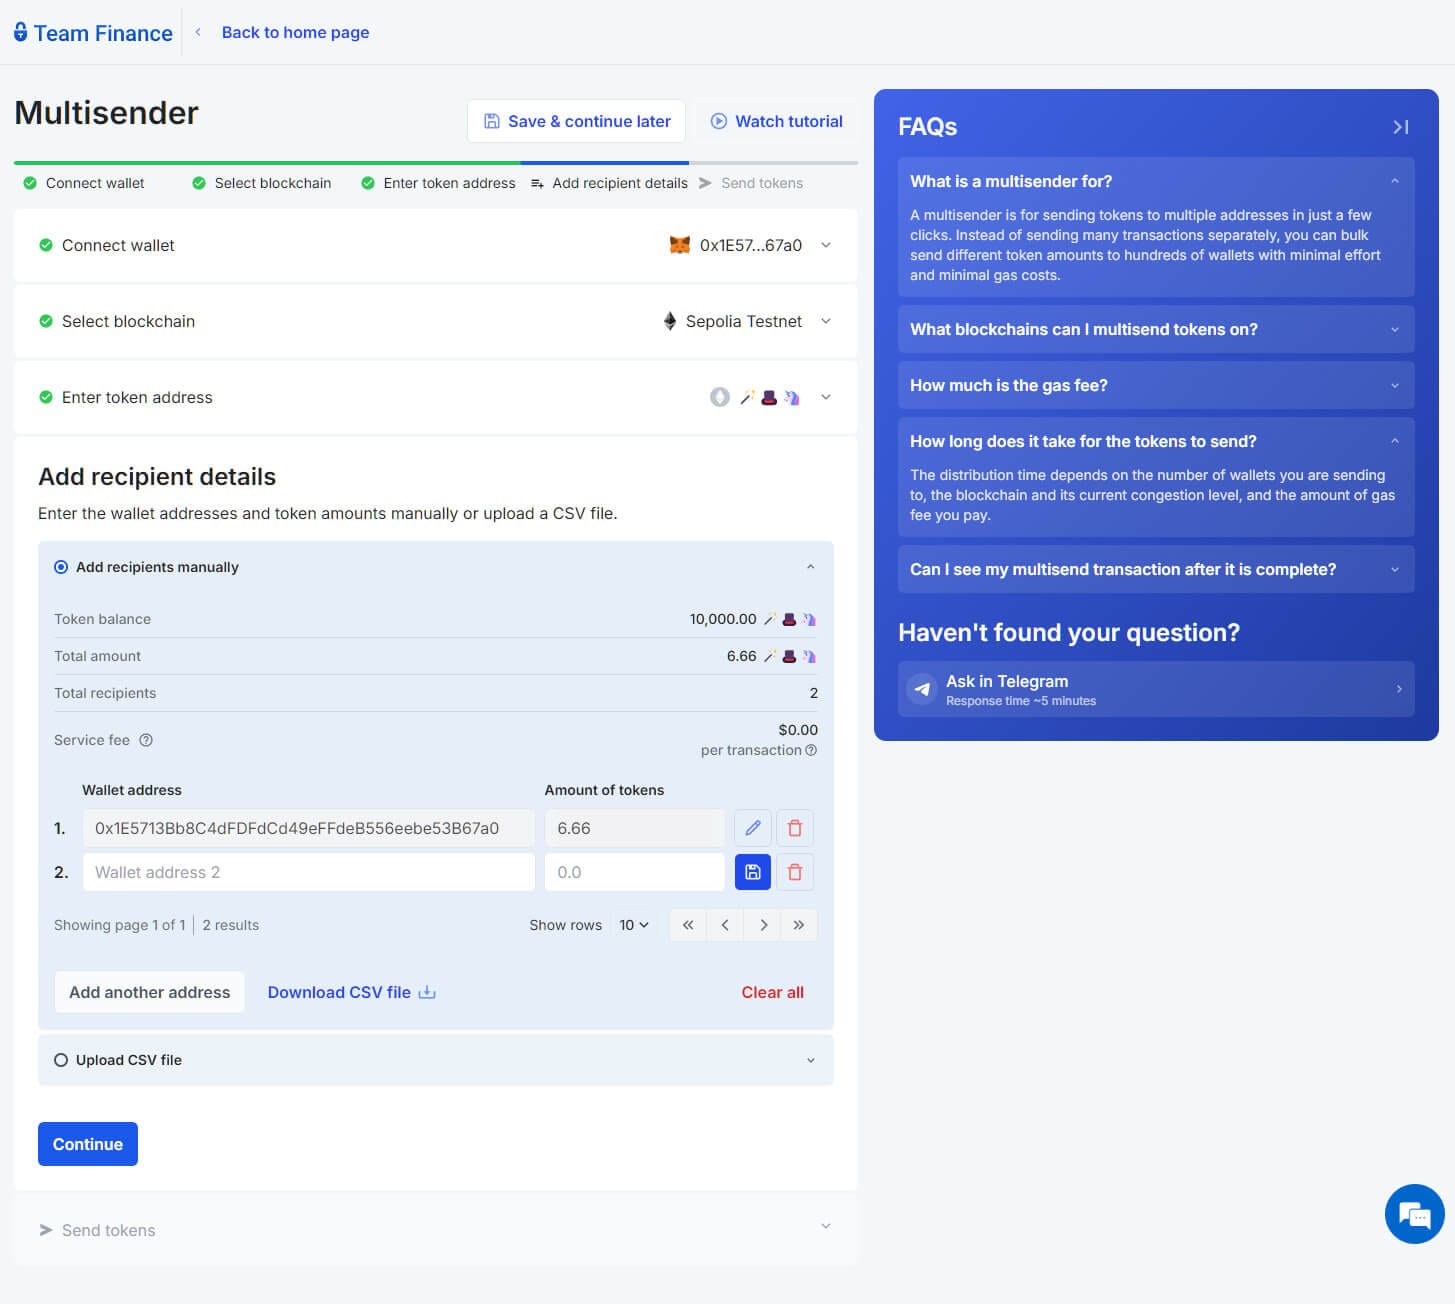
Our super easy wizard helps you add addresses one by one, with the ability to save, edit or delete right from the tool.
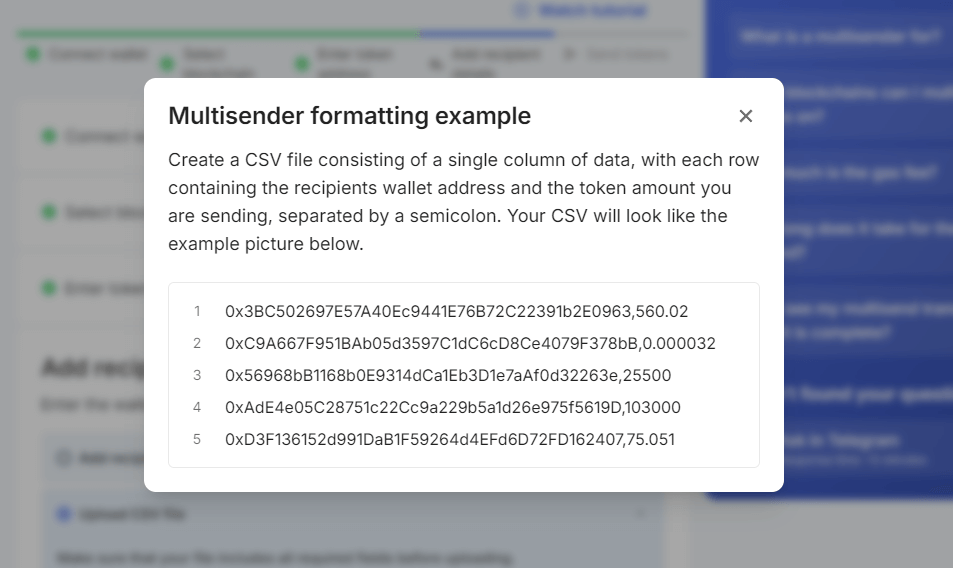
Alternatively, you can add wallet addresses via a CSV upload - much easier for large airdrop or distribution campaigns.
Confirm your Transaction

Finally, give permission and confirm the transaction in your wallet - this completes the process and starts the multisender process.
As you can see, my Blockchain, Token, Total number of Recipients, Total to Send, and Service Fee are all listed before completing the multisender process.
Congratulations, you're finished!
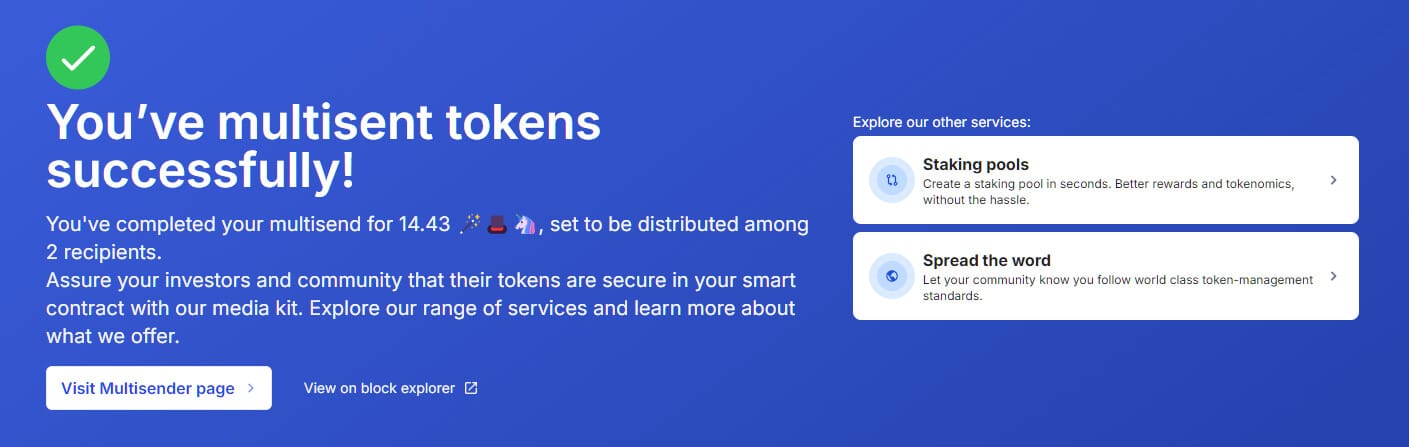
After a few seconds, the green check mark will appear, and you'll see a successful message. From here, you'll be able to "Spread The Word", view the transaction on a block explorer, or visit the Multisender Dashboard
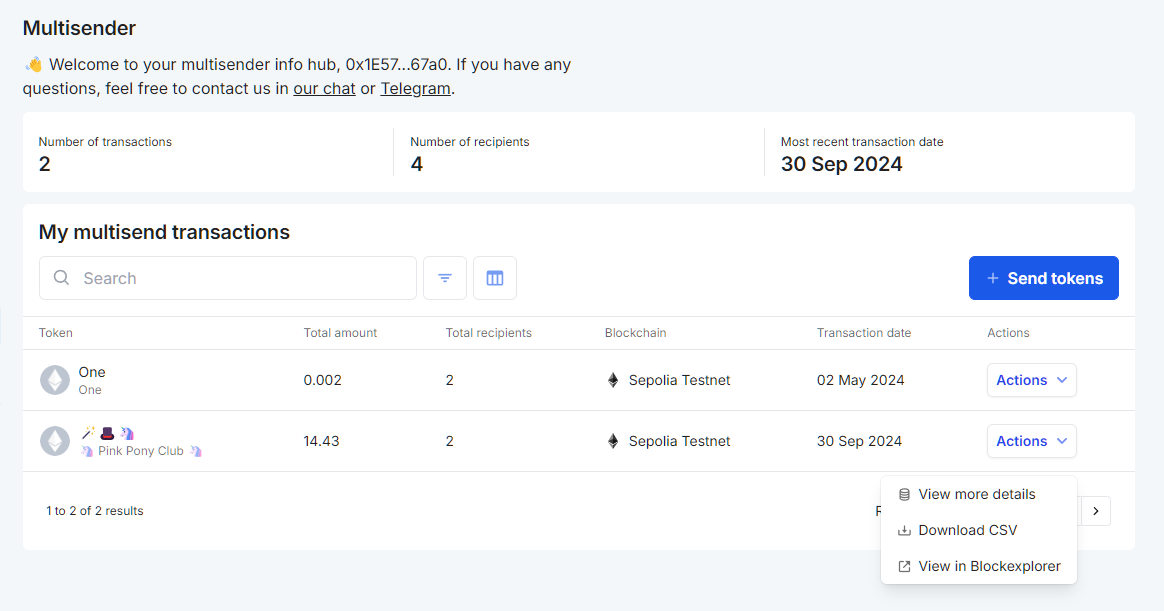
As with all our services, your new multisender report will be available in the token management dashboard.
You can search for previous transactions, download a csv, or view specific details about each multisender transaction attached to your wallet.