
How to Create a Token Vesting Schedule - A Full Guide
How do you create a token vesting schedule? We show you how to easily create one in minutes with our full guide...

With 22+ blockchains to choose from, multiple wallet options like OKX, Rabby, MetaMask, and WalletConnect, we wanted to create a tool that simply beats the competition with options and features.
With over 38,000 customers, we're securely placed as the top token vesting app.
Let's learn how to create your own custom vesting in just a few minutes, from beginner to pro...
1. Go to the Token Vesting App
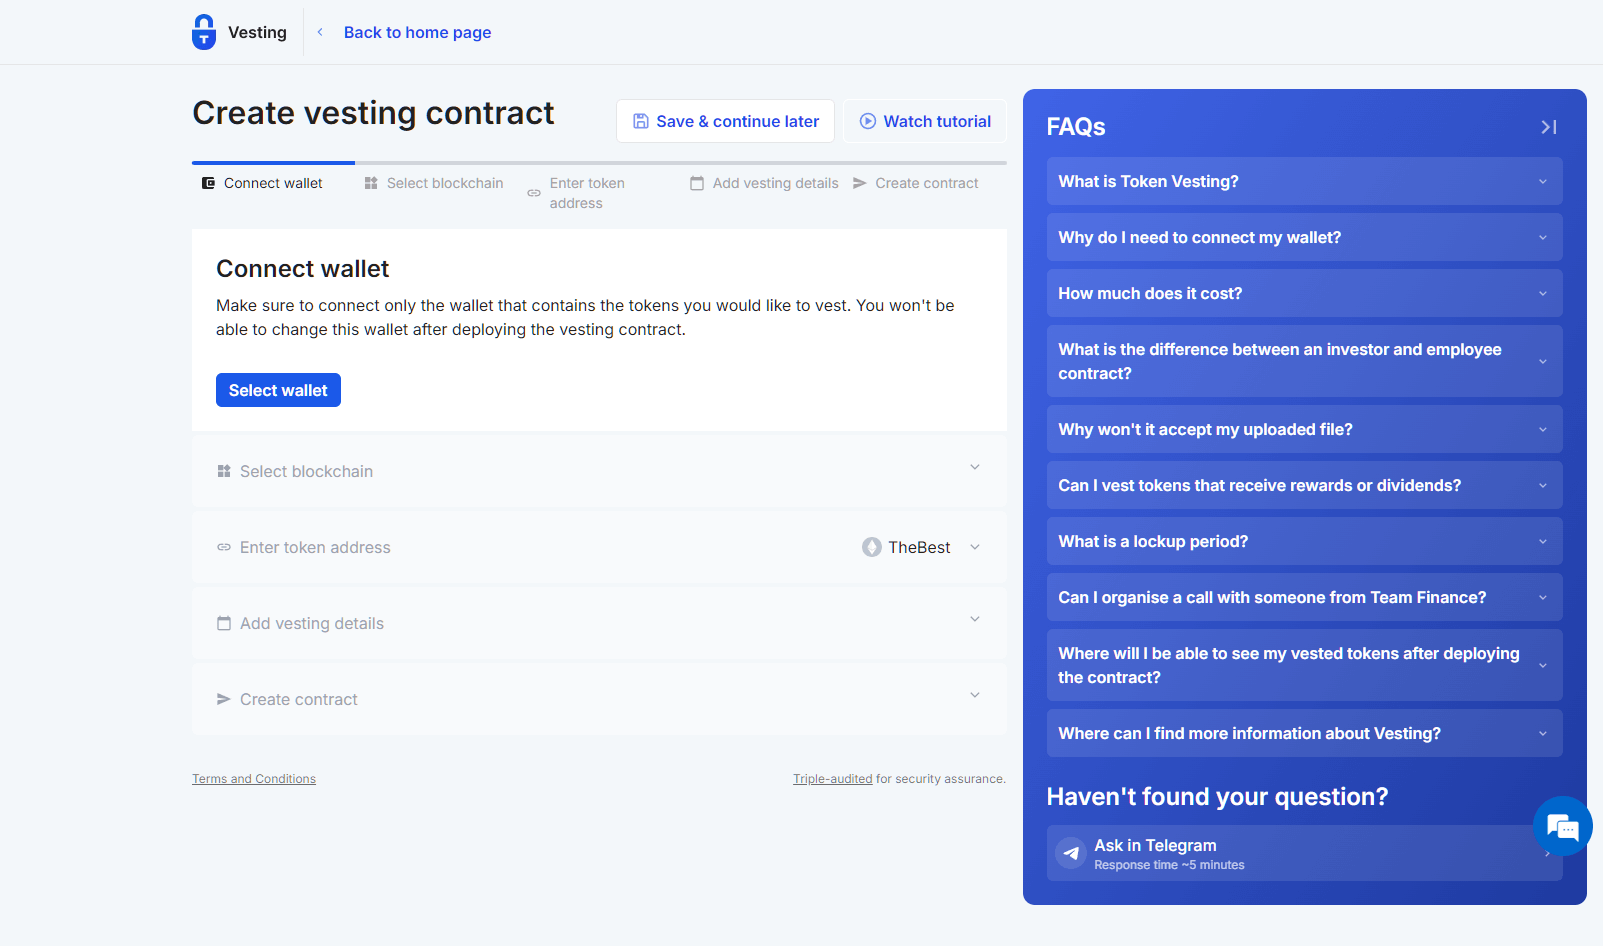
Visit the token vesting app to get the process started
Want to watch someone create a vesting schedule in real time?
We added a "Watch Tutorial" option with a popup YouTube video.
Along with Vesting FAQs, and a "Save & Continue Later" option to make things easier for you.
2. Connect your favorite wallet
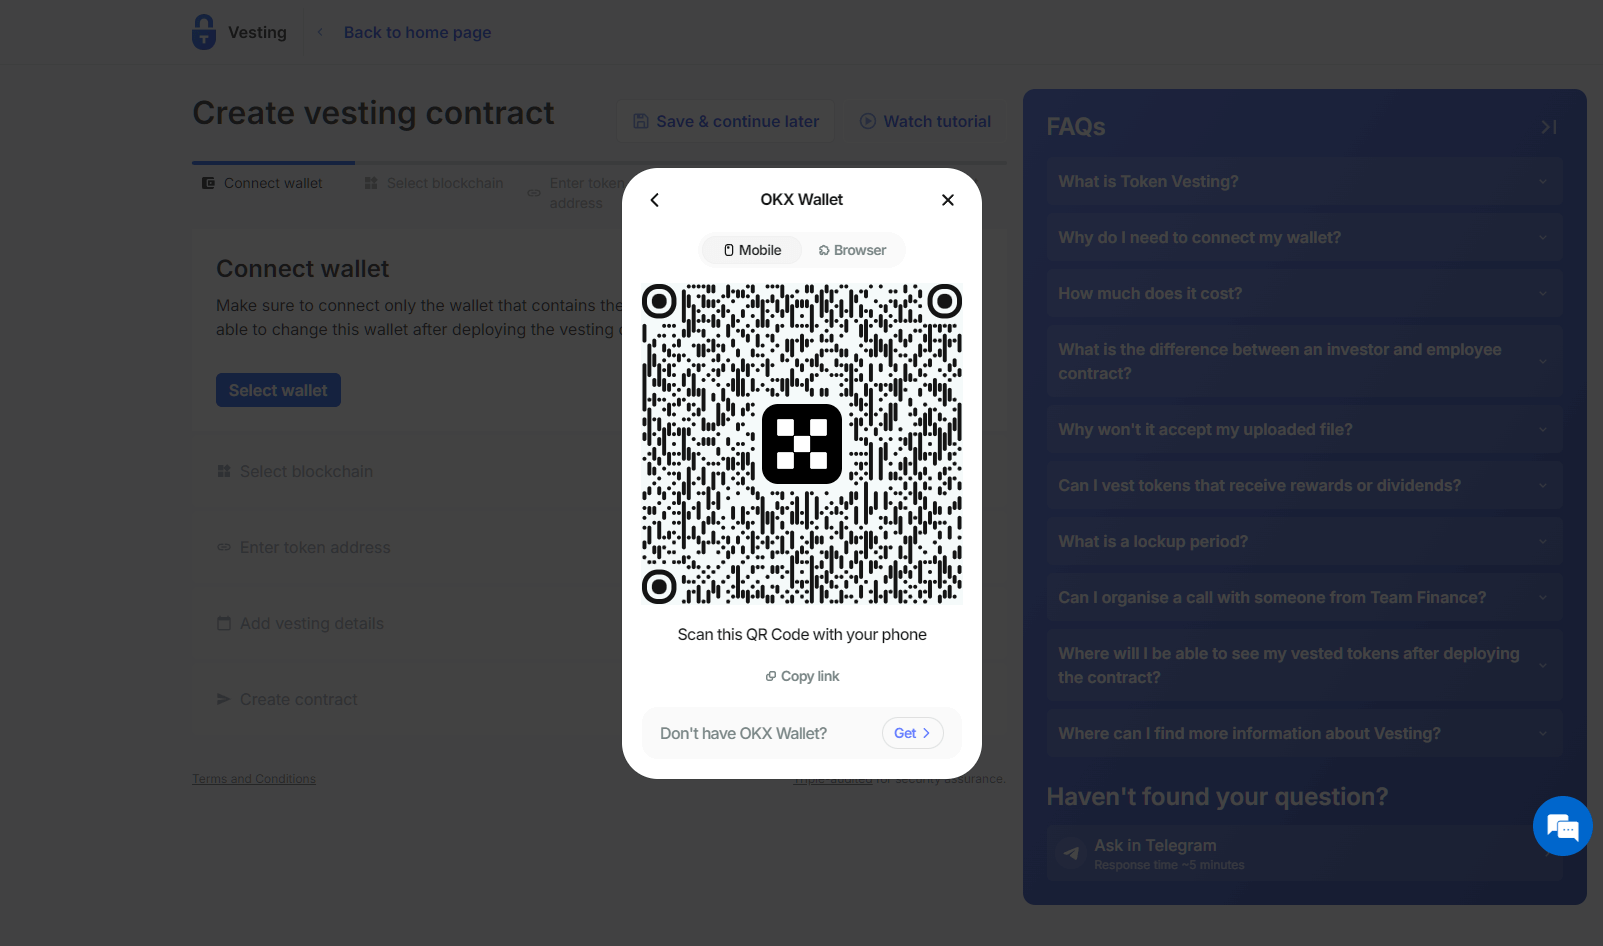
You can choose from EVM wallets like: MetaMask, WalletConnect, Coinbase, Ledger, and more. Or, non-EVM wallets like: Solana, Tezos, Casper, Conflux or Algorand.
Mobile, Browser, Extensions, QR Codes - there are lots of different options to choose.
3. Choose a Blockchain for Vesting
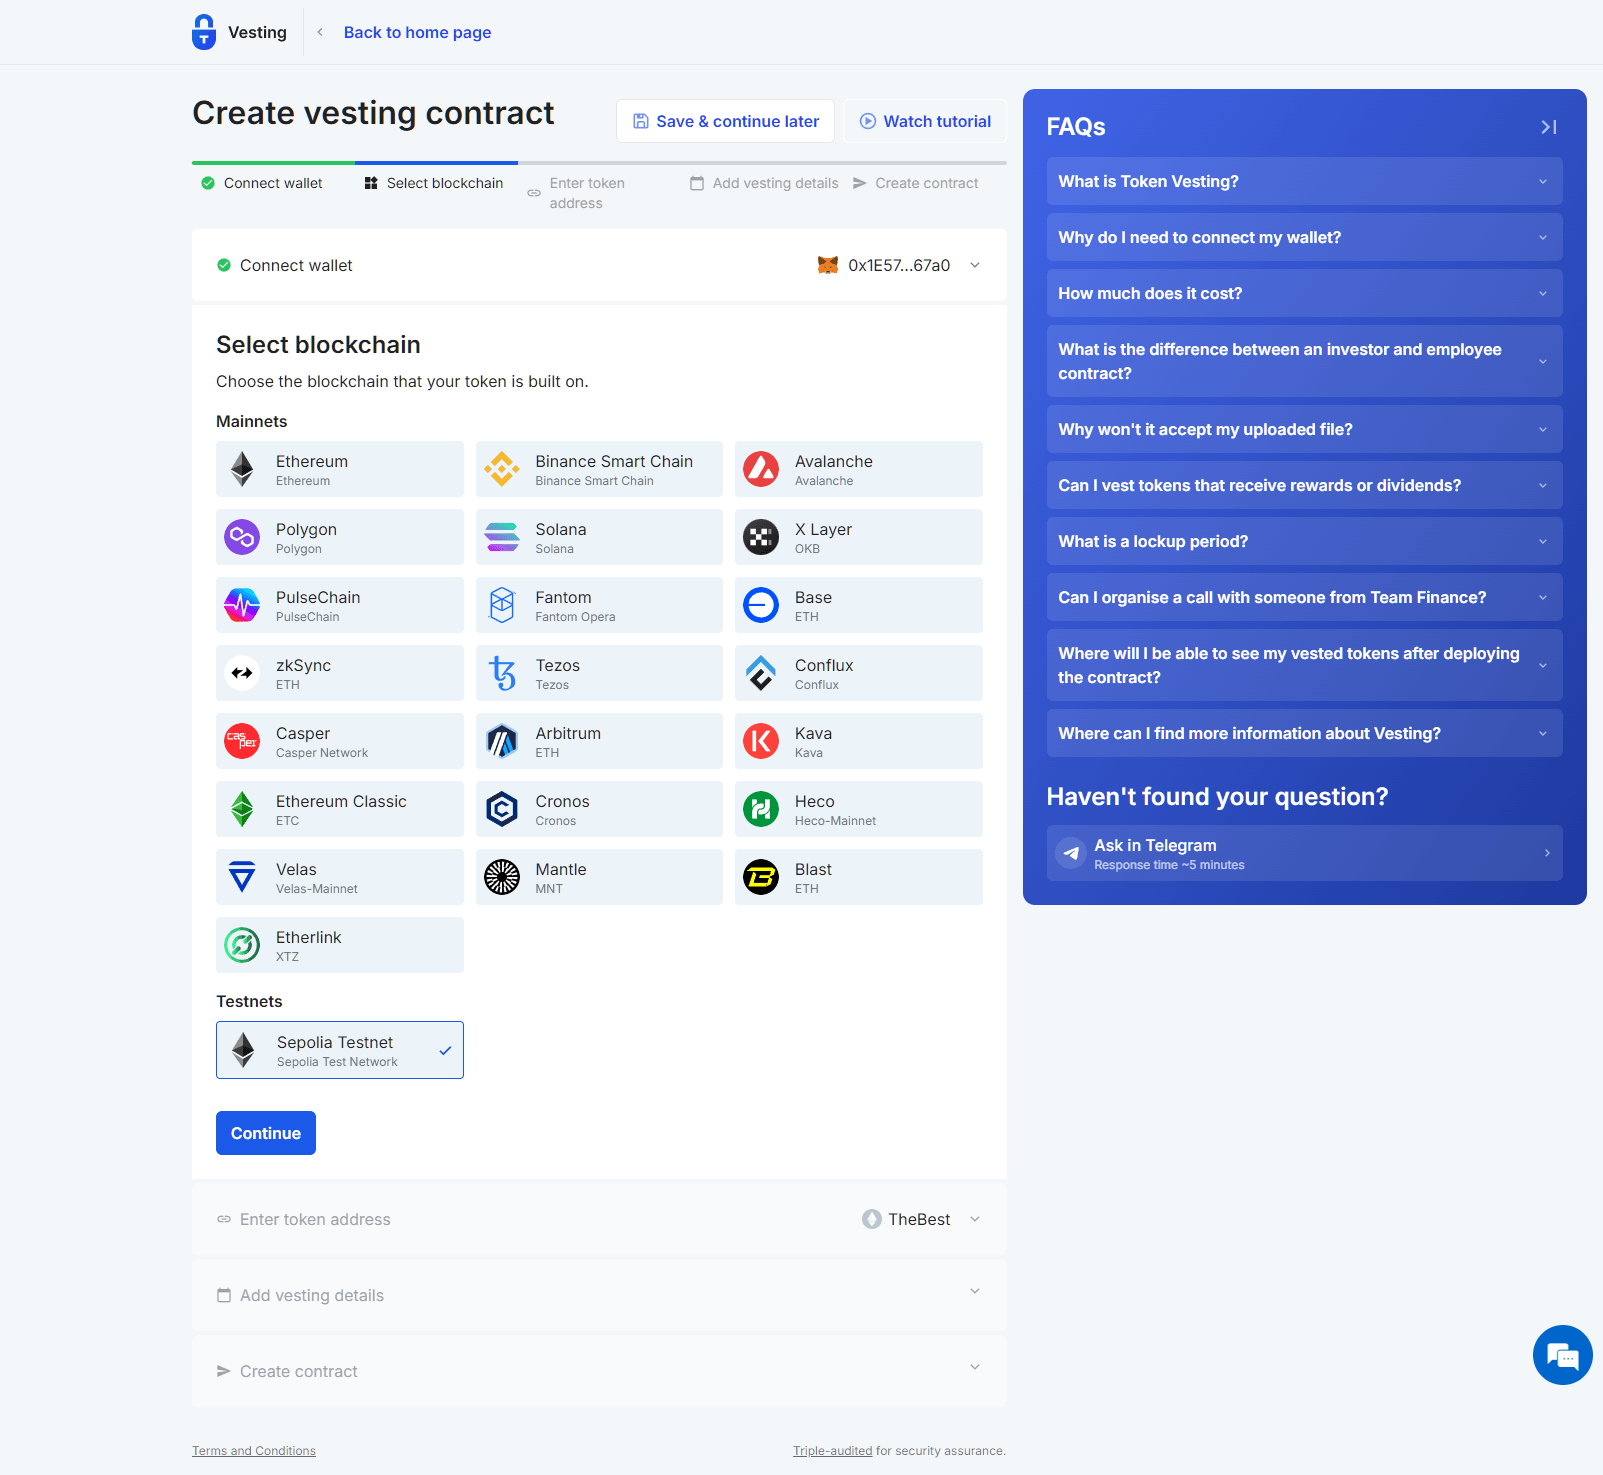
Select from a wide range of blockchains for your vesting contract, including X Layer, PulseChain, zkSync, Etherlink, and of course Ethereum.
There is a testnet option to try all our services before you buy, so in this tutorial we selected Sepolia.
4. Enter your token address details
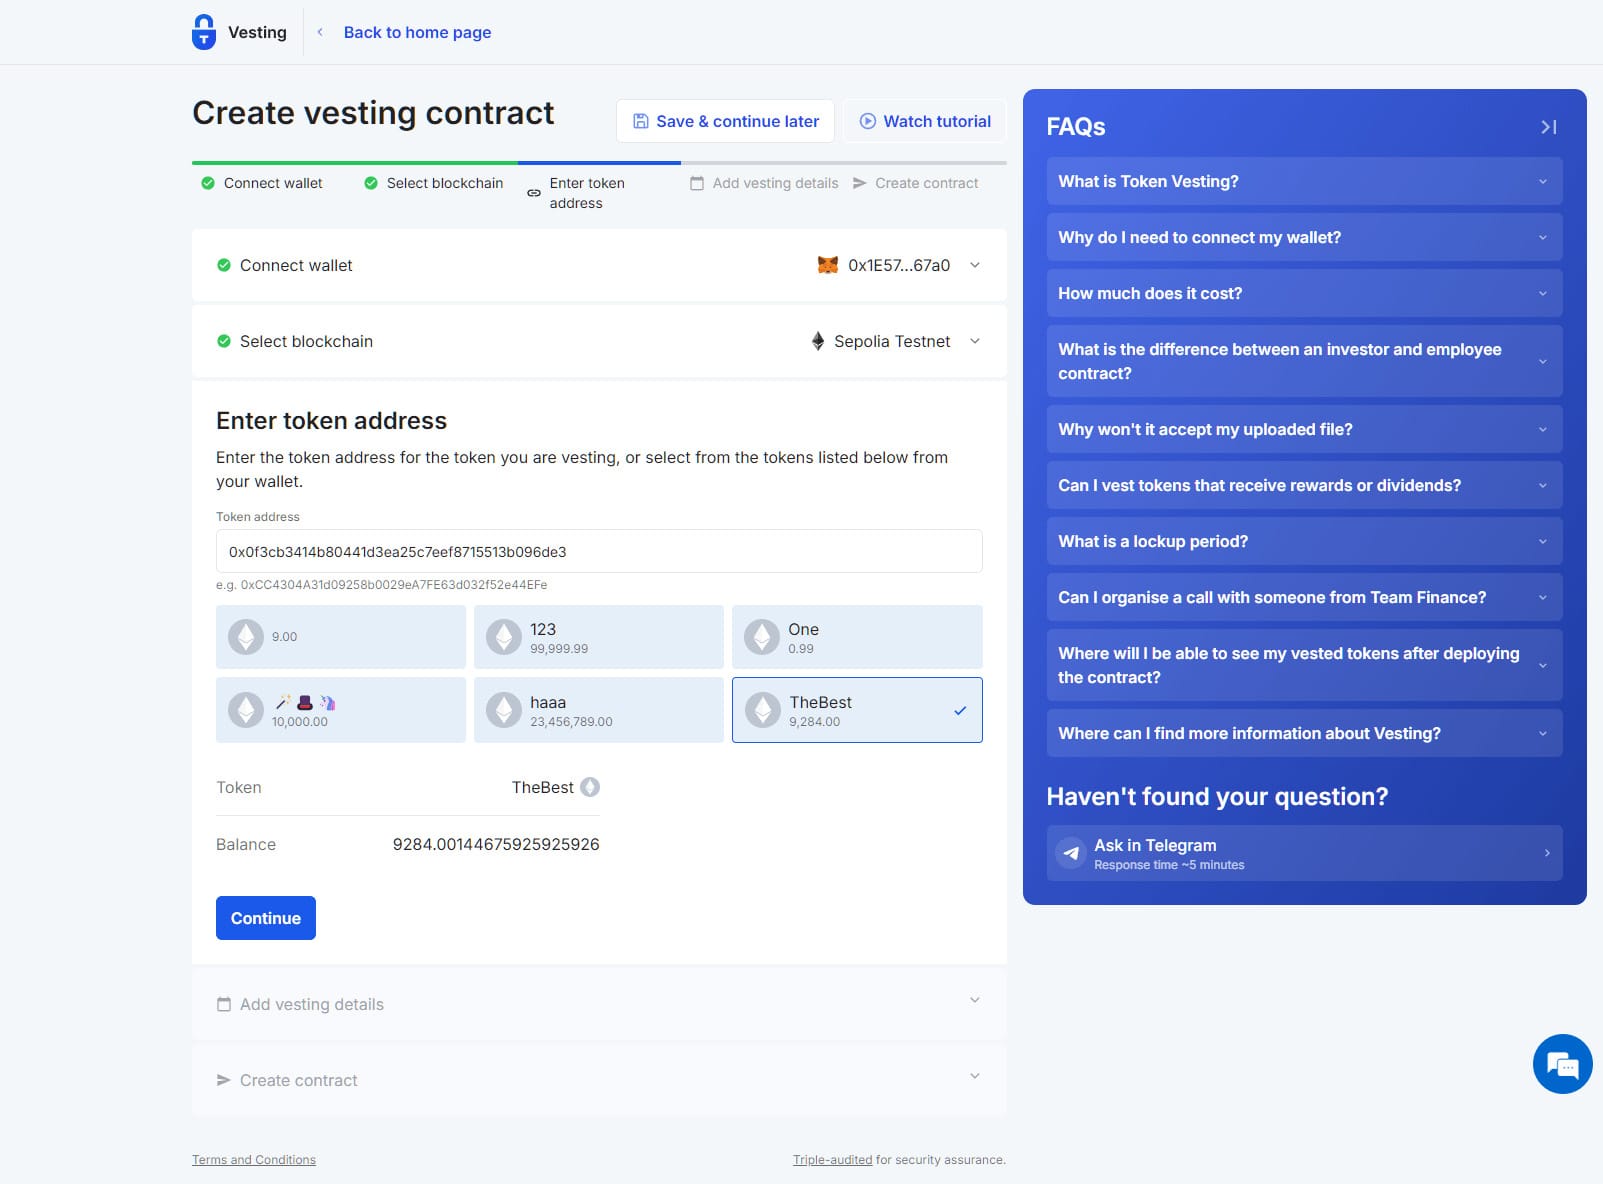
Find your token address and enter it into the field, or select one of the tokens pulled directly from your wallet information.
Here you can see that I've selected TheBest token, as it's one that I created using our token creator tool.
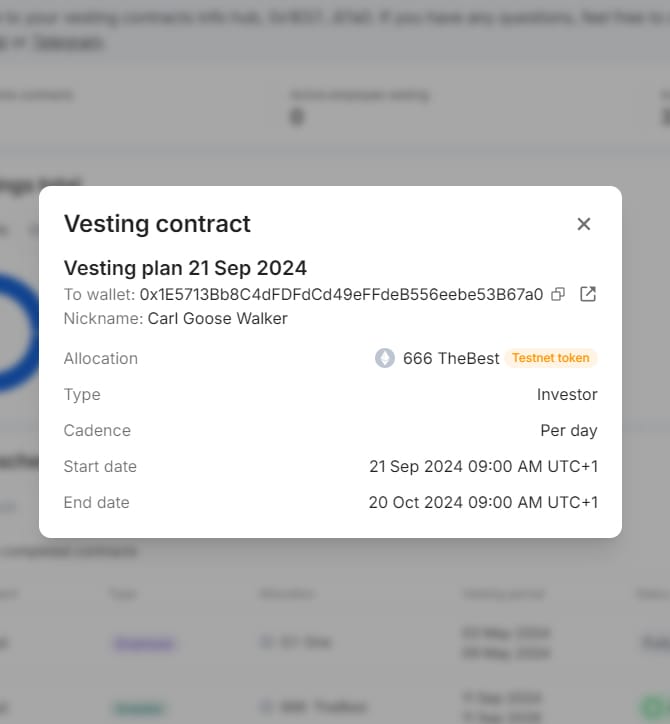
5. Add the vesting contract details
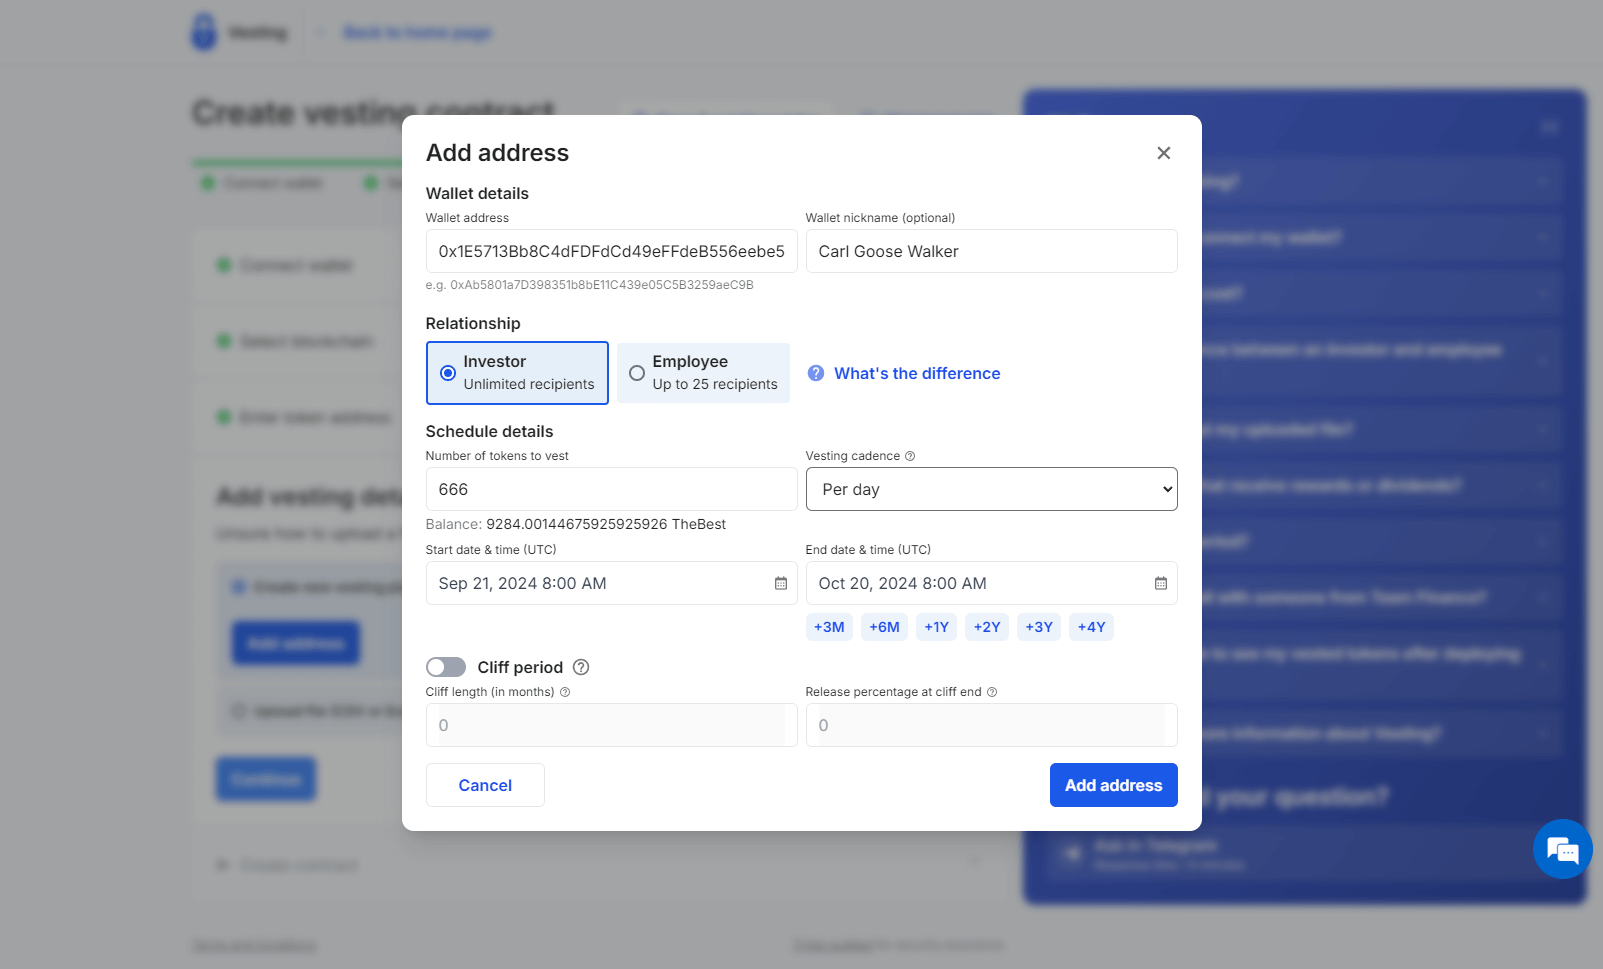
This is the most important step, and comes with a lot of options, so take your time to make sure all of the information is correct.
For each address in the vesting schedule, you have the option to:
- Wallet Address
- Wallet Nickname
- Select the relationship (investor or employee).
- Number of Tokens
- Vesting Cadence
- Start & End Date
- Cliff Period Details
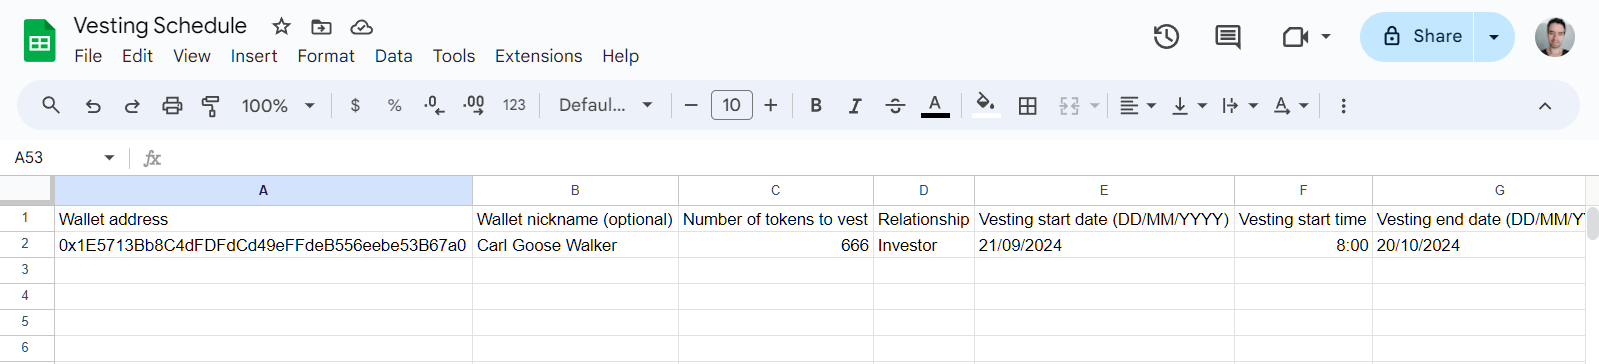
If you would like to enter this information via CSV (perhaps you have a lot of addresses and details), we have the option to download our template and edit the details by hand.
6. Confirm the token vesting smart contract
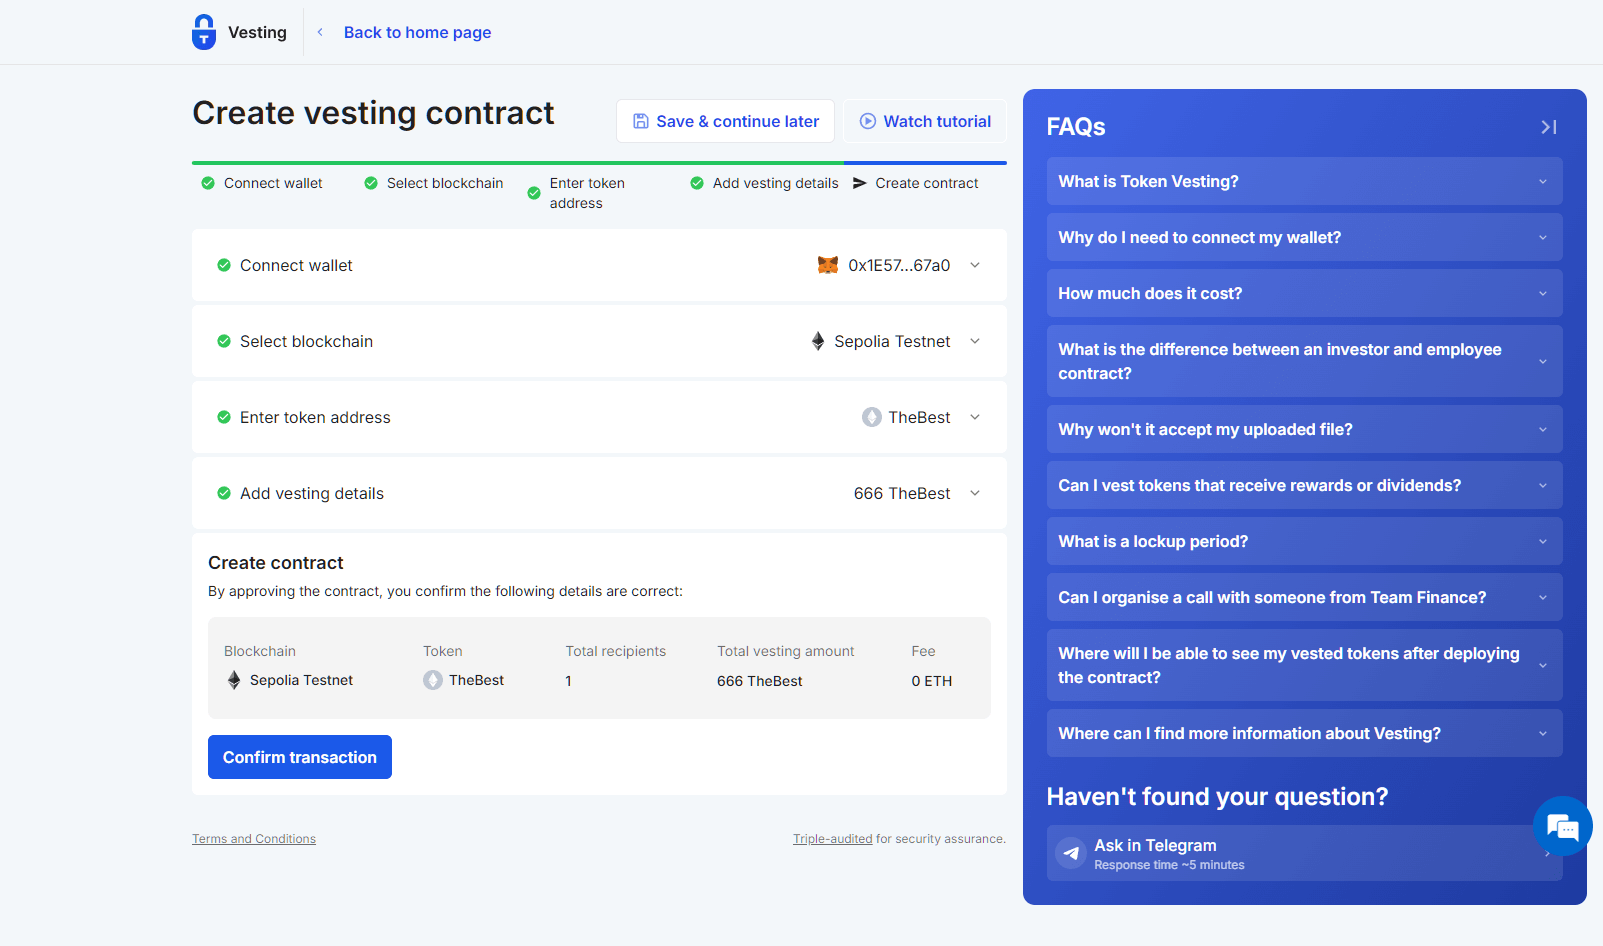
The final step is to Confirm The Transaction in the app, and your wallet.
Make sure all the details of the schedule are correct, and you are happy with the fees shown in your wallet also.
Depending upon network traffic, it could take a minute or two before the vesting schedule is completed.
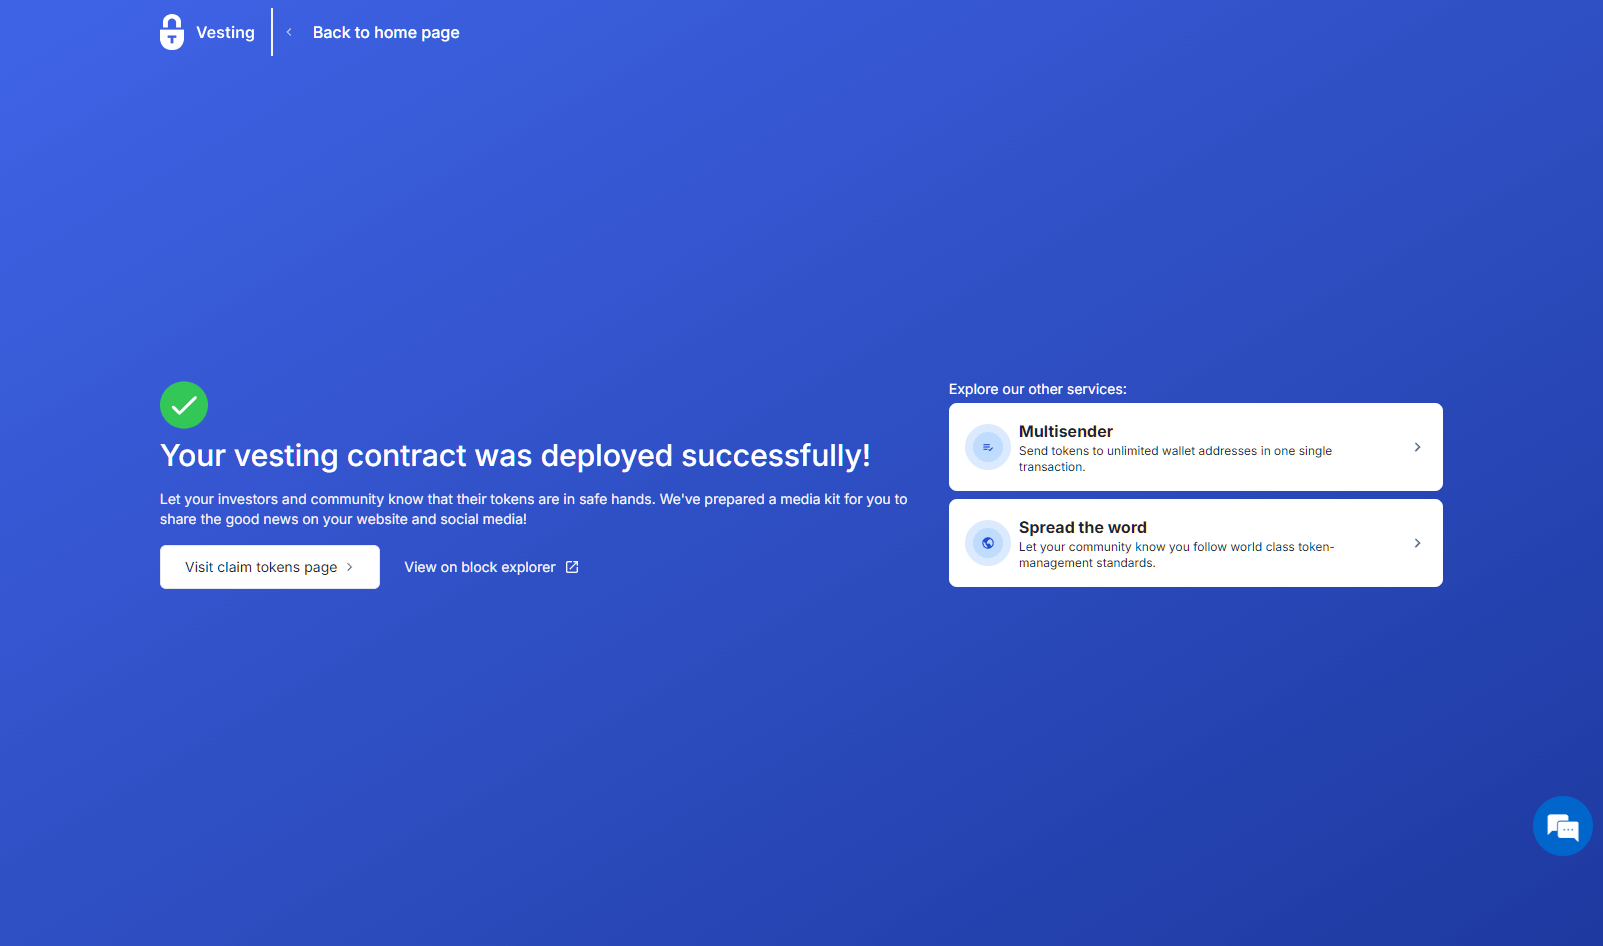
Congratulations, you will now have your custom vesting schedule created!
You will be shown a beautiful blue success screen with options to try other services like Multisender, "Spread the word" about your project, or view the details in your vesting dashboard.
View the transaction on explorers like Etherscan
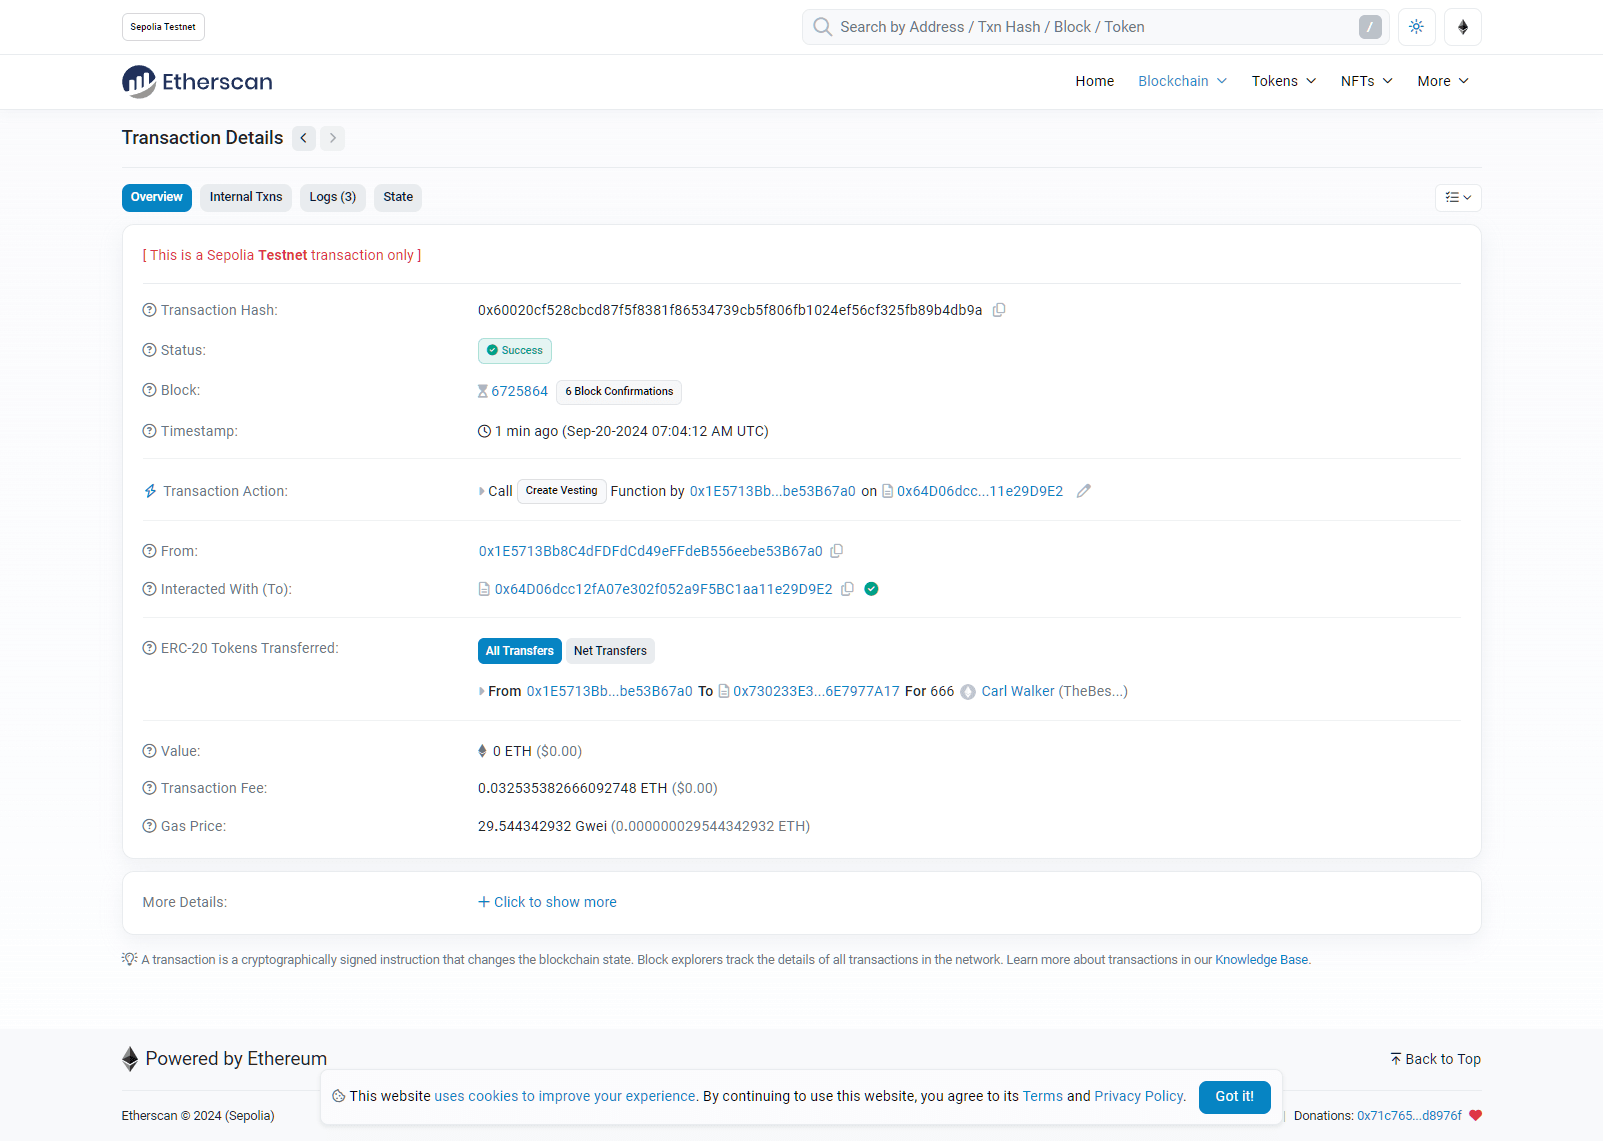
Transaction Details will be available on explorers like Etherscan (depending upon the network you chose) via the link on the success screen.
Token Vesting Dashboard Features
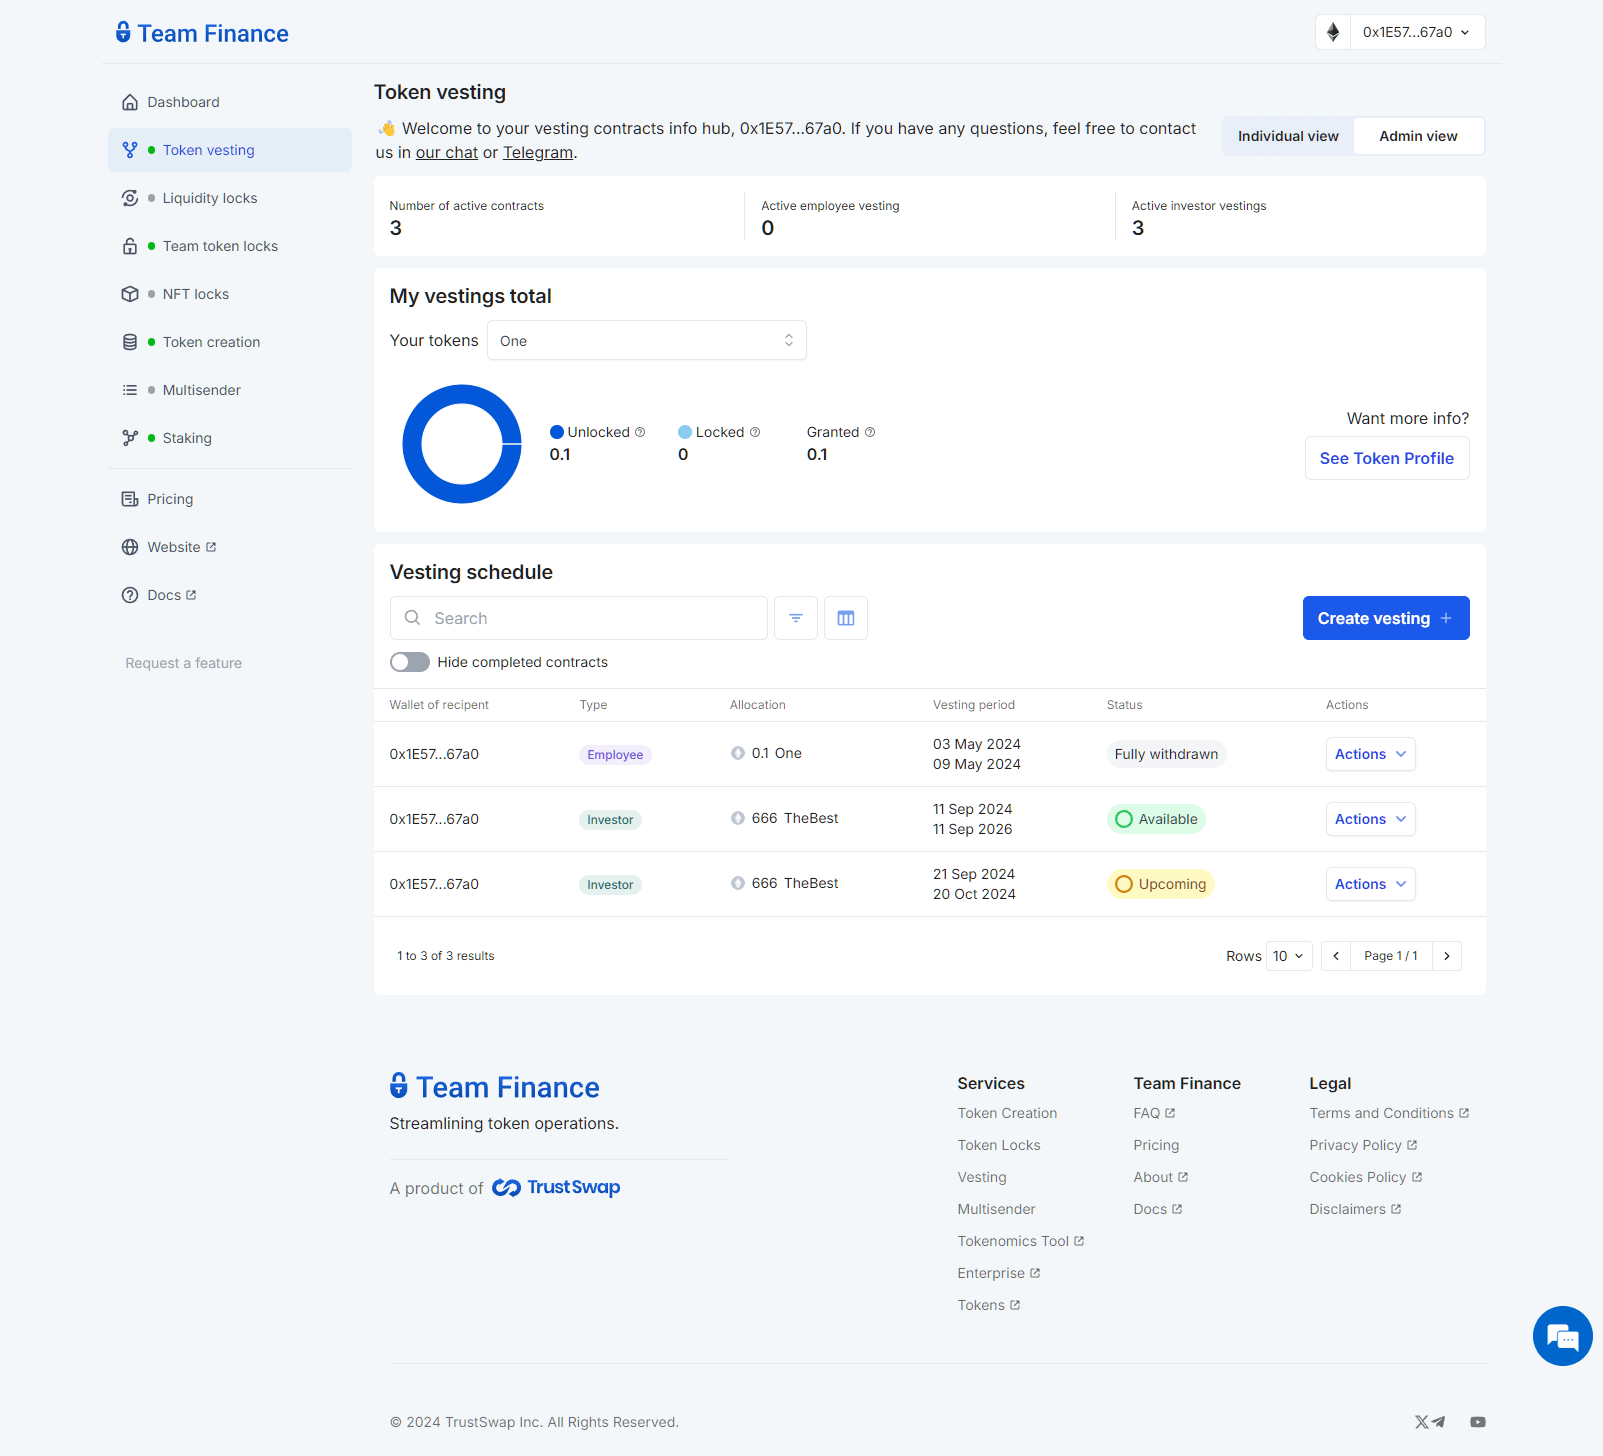
The Token Vesting Dashboard will now show all the vesting schedules you have created or take part in.
We included options to search, filter, and hide contracts from your dashboard.
Along with an "Actions" dropdown menu where you can view further details, or take action like "Withdraw" tokens.
Are you new to token vesting, and need to know where to start?
We created a complete guide on token vesting for project leaders - giving you all the steps you need to prepare, collect details, and keep your stakeholders, investors, and community involved along the way.
Token Vesting Creation
The #1 vesting app for web3 projects
Create a Custom Token Vesting Schedule Today